LAYING UP ON THE HARD

SY AVANT 🇨🇦 Rob & Debra – Beneteau 43.5′
We’ve had Avant offshore for a few years now and have developed a routine for
laying her up for the off season. It’s a fair amount of work, but pays
dividends in letting us come back to a vessel that’s not suffering from
mold or mildew, and hasn’t degraded (much) from the weather when we’re
away. We have set Avant up to wait for us on the hard and in the water,
and each has its unique requirements. Preparing the boat takes a
few days, but the effort pays dividends on our return.
MOLD
Mold is perhaps the most pernicious hazard for a laid up boat in the
tropics. If it gets a foothold, the warm, moist interior of the boat is
the perfect environment for it to grow, and it will grow everywhere, on
any surface. To forestall its growth, we clean the interior aggressively
and then spray all surfaces with a mixture of straight vinegar mixed
with a drop of dish soap per litre/quart (the dish soap is a surfactant
and stops the vinegar from beading), wipe them with a cloth wet with the
same mixture and allow the vinegar to dry in place. The ph value of
vinegar is antithetical to mold growth, and it simply won’t start where
there is vinegar on the surface. The smell is overwhelming on
application, but fades in an hour or so, and is undetectable on our
return. We also mist curtains and cushions with the same mixture, spray
liberally in the bilge, and leave a few bowls filled with just vinegar
(no soap) in various places around the boat to evaporate while we’re
away. We use at least a couple for gallons for this process.
 |
View under the sun shade awning as we start to ‘gift wrap’ the rig with aluminum foil.
TARPS
Tarps are used for a couple of things: to keep sun off the decks and thus
control heat, and to keep the rain off portions of the deck. We use
them, but under the tarps we do get algae on deck.
BUGS
Of course, we live in fear of a bug infestation of some sort while away.
We buy cockroach bait (apparently the kind that comes in a tube like
toothpaste is best) and roach hotels and place them around the boat. We
use the whole tube, as this is not the place for half measures. We have
found two dead roaches and no live ones aboard on our return in the 14
years we’ve been laying up. We shudder to think how many we might have
found without the poison set out.
FOOD
The temperatures in the interior of the boat will be extreme: in the Sea of
Cortez, interior temperatures of 140°f/60°c are typically reached daily
for a boat on the hard for weeks at a time, and 120°f/49°c for a boat
in the water. We have had cans of food explode from the heat, and an
unopened bottle of ketchup left aboard cooked in the heat to turn the
rich dark brown colour of bbq sauce. For unopened food we want to try to
keep, we get small plastic bin liner bags and after emptying and dosing
the interior of the lockers with their vinegar wipe-down, we double bag
the food in small batches and stow back in the lockers. If a can
explodes it will do so inside the bag and the mess will be contained to
the ½ dozen or so items sharing the bag with it.
PLASTIC
Items made of plastic do not fare well. The heat and UV bake them. For items
below decks, we wet out a cloth with ArmorAll, Aerospace 303 or a
similar plastic treatment (easily found at auto stores) and wet wipe
them down. For items on deck that can’t be removed and brought below, we
treat them with protectant, wrap them in a layer of paper towel, wrap
aluminum foil over that (two layers of cheap tin foil seems to work
better than a single layer of thicker expensive stuff) and then secure
the tin foil with liberal amounts of duct tape (being very careful the
duct tape only adheres to the tin foil and not to anything under it). On
our return we find the duct tape has usually been reduced to a skeleton
of the reinforcement fabric and is easily removed.
We also wrap winches, blocks and all other deck hardware in a similar
fashion. UV will destroy the ball bearings in ball bearing blocks.
ZIPPERS AND SNAPS
Zippers and snaps like to corrode shut while the boat is laid up. We rub them
with cheap dollar store chapstick or lip balm (cheap lip balm is usually
a mix of waxes and petroleum oils like Vaseline) to increase the
chances they will work when we return.
ELASTIC
Elastic will no longer be after a season of baking in the heat. Shock cords
should not be used to secure anything as they will perish. Elastic in
clothing and swimming suits may not be elastic on your return.
LIGHTNING
Grounding. Most vessels are poorly grounded, and their grounding is ineffective
when hauled (yes, you can be struck by lightning when on the hard). You
can ground your boat quickly and simply with a set of jumper cables (or
add these to increase the grounding)
If in the water, we buy a set of cheap but fairly thick jumper cables.
Separate into two wires. Remove one clamp from each wire, strip back a
couple or six inches of insulation and ‘fray’ the end (or keep the clamp
and clamp it to a 1’x1’ metal plate) to make a better ground connection
with the water. We attach remaining clamp to a top shroud or other bit
of metal that connects to near the masthead and throw the frayed/plated
end in the water. One cable on the port side, one cable on the starboard
side.
If on the hard, separate cables and attach one to the top shrouds and Jack
stands on the port side, the other to the same points on starboard.
In either case, the cables will be trash at the end of the season, as they
are not designed for continuous outdoor use. Brushing clamps with wax,
Vaseline or any other topical protectant helps them rust less and look
better longer. Even if you *think* your boat might be/is well grounded,
these jumper cable tricks will ensure/increase the protection.
We gather up all portable and easily de-mounted electronics (hand held VHF
and GPS units, epirbs, led flashlights, portable radios, etc.) and wrap
them in paper towel, then in tin foil, then in plastic food wrap
(secured with masking tape), and then place them in the oven as a kind
of double faraday cage. We disconnect all antennas and easily unplugged
items like chartplotters, AIS, VHF, etc. and leave them disconnected and
just hanging to disrupt possible paths for lightning.
BATTERIES
Small batteries (AA, AAA, C, D, 9V, silver cells like A76, CR2025 and CR2032,
etc.) are removed from whatever they are powering, gathered,
inventoried and given away. They won’t be any good when we come back,
and we need to know how many and of what type we will need to bring when
we return.
The ships batteries (house and starting) we leave connected to our solar
array for charging while we’re away, to make sure power is available to
our bilge pumps. We disconnect (switch off at the panel) the shore side
charger as superfluous.
BILGE PUMPS
We inspect and test our bilge pumps. Avant will take on a bit of water
through the mast, and other leaks may appear over the season. We want a
bone-dry bilge to keep interior humidity down. We know of several
cruisers who have had a battery die due to bilge pump pumping, and
another couple who lost their boat to flooding while on the hard (their
cockpit drains blocked and water flooded in the companionway in a
tropical storm). If your boat has a garboard plug, you can leave it out
if you’re on the hard, and if it doesn’t and the concept works for your
hull form you can consider adding one.
THROUGH HULLS
We close all through hulls and tank vents and stuff stainless steel
scrubbies or rolled up green scrubbies in them if we’re on the hard. The
scrubbies prevent bugs from nesting in the holes. Some cruisers use
bromine tablets (for hot tubs) in their raw water strainers to
discourage growth there.
HEAD AND HOLDING TANK
We empty the holding tank and pump in 1 – 1½ gallons or so of vinegar and a
liberal amount of Pinõl or Lysol type cleanser. Better to have that
bake in the heat than what was in there before, and a completely dry
tank will form concrete-like deposits.
SAILS AND CANVAS
Sails and canvas are removed, inspected, repaired, cleaned, and neatly folded to be stowed below.
ENGINE
Our engine enjoys an oil change, fluid top up and wipe-down with an oily
rag before we go, and we leave the compartment door ajar so air can
circulate there too. Many cruisers do a freshwater flush of the
exhaust as well, but we don’t bother. Outboards are freshwater
flushed, given their annual service, and run dry of fuel before stowing below.
FUEL TANKS
Diesel tanks are filled to the top and treated with biocide (BioBore or
similar). Gas tanks are emptied, the gasoline given away, and the
plastic tanks are treated with ArmorAll or similar. We don’t bother
trying to ‘stabilize’ gasoline for storage, the quantity doesn’t justify
it. Jerry cans are emptied and treated with ArmorAll or similar. The
empty jerry cans and gas tanks are stored below.
PROPANE
We simply shut off the propane at the tanks.
WATER TANKS
Water tanks are emptied. When we return, we treat them as if contaminated as
recommended in this article. The water pump (and all other breakers save
the bilge pumps) is shut off.
MOORING LINES AND FENDERS
If we’re in the water, we double all mooring lines and add chafe guard (we
use fire hose) at all chafe points. We buy cheap children’s T-shirts
and slip them over our fenders as extra chafe guard/ UV protection,
securing them at the top end with small line or zip ties.
Even if you have a hired ‘boat watcher’ they’re unlikely to be 100%
available to come to your aid in a storm. They may be looking after
multiple boats, or the roof may be blowing off of their house (or their
mother’s house) in the same storm that threatens your boat. You need to
be secured for a storm.
Dinghy
We have a RIB inflatable dinghy, and some years we have been able to
secure covered storage for it at the marina or yard we’re at, which is
best. Other years we secured it to the deck upside down, inflated to
about ¾ normal pressure, spaced off the deck with dollar store pool
noodles and covered with a tarp. Protection from the sun while ensuring
its wrapping can’t hold water against the fabric are the keys to
success. If you can deflate yours and stow it below, that’s even better.
BOTTOM CLEANING
If you store in the water, you will need to arrange for regular bottom
cleaning. The interval will be determined by local conditions. Make sure
the cleaner is reliable, has references, and sends pictures or other
proof the job is being done: we know cruisers who found their cleaners
simply cashed the payments and didn’t do any cleaning until just before
their return.
CONTACT INFO
Post a card in the window with local contact information for your
boat-watcher (if you have one) and your contact info back home: name,
email, phone numbers.
When we return, we find Avant fresh and dirty, needing a good wash after we
enjoy a Christmas-like morning: like an unwrapping party of all her
tinfoiled appurtenances. After some reassembly, we’re ready to cruise
another season.
SY AVANT 🇨🇦 Rob & Debra – Beneteau 43.5′
FLEET UPDATE-2022-05-29
|
|
|
Refrigeration Trouble Shooting Guide
Troubleshooting Marine Refrigerators
(excerpts from Indel Webasto USA and Isotherm-parts)
This guide was created to help the non-professional refrigerator owner and professional service company trouble shoot a marine refrigerator. It starts with the most common cause of failure and describes actions you would take to determine the cause of failure.
Loss of Power: A break in the wiring or loose connectors is one of the most common sources of refrigerator failure. To test the power supply for the refrigerator, you must test at the electronics module.
- Start by removing the refrigerator from the cabinet enclosure so you can easily reach the electronics module on the back of the refrigerator.
- The refrigerator is held with screws in the flange to the face of the cabinet. Remove these screws and gently pull the refrigerator from the enclosure. There should be sufficient length of wire to set the refrigerator down in front of the enclosure with power wires still connected.
- With a voltage meter, test the voltage coming in to the power connectors by inserting the probes into the positive and negative power inputs. You should get a reading of 12+ volts for DC and 100 volts or more for AC. It is important to test the power at the terminals on the electronics module. Bad wiring or connectors can keep power from reaching the electronics module.
- The compressor should run continuously at low speed when terminals T and C are connected. This will confirm that the electronic module is OK and that the power supply is adequate for low speed operation. If the compressor does not run or runs intermittently, starting and stopping after a few seconds, this may be caused by a poor power supply or a faulty electronic unit. To test the power supply, use a digital voltmeter. Measure the voltage at the electronic unit with the compressor off and note the voltage. Measure the voltage again with the compressor starting or running - the voltage should drop no more than 0.5V - if there is more than 0.5V drop, check all the terminals and connections carefully fort good contact, tightness and signs of corrosion. It can be helpful to connect a separate test power supply. Run separate wires (both positive and negative) directly to the batteries and re-test the power supply. Ensure the wire size is adequate for the length of run.
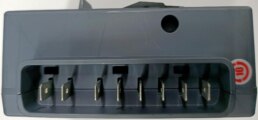
 DC electronics module (left) AC/DC module (right)


Thermostat Failure: If you have proper power and the compressor is still not running, test for failure of the thermostat by connecting a jumper wire between terminal “C” and terminal “T” on the electronics box. If the compressor begins to run, this indicates that the thermostat has failed. The thermostat is easily replaced.
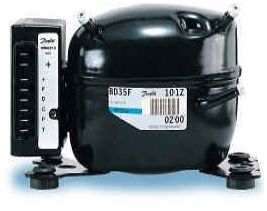
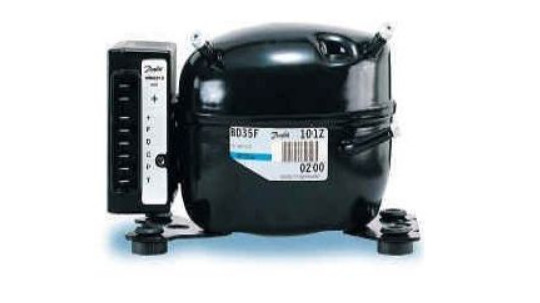
Procedure above is to be used when you have an ASU module installed
Electronics Failure: If after following the above steps and the compressor does not run, this would indicate the electronics box has failed. Replacement of the electronics module is easy.
With this simple test, we can help you identify the source of failure and restore your refrigerator to proper operating conditions. Remember that ventilation is the key to getting the best performance from your refrigerator. Cabinets sometimes trap and hold hot air which can reach temperatures above 40 degrees C (110 degrees F), the maximum recommended operating temperature for a refrigerator. Air temperatures in cabinets should be cool enough that the condenser can efficiently exchange the heat it removes from the refrigerator.
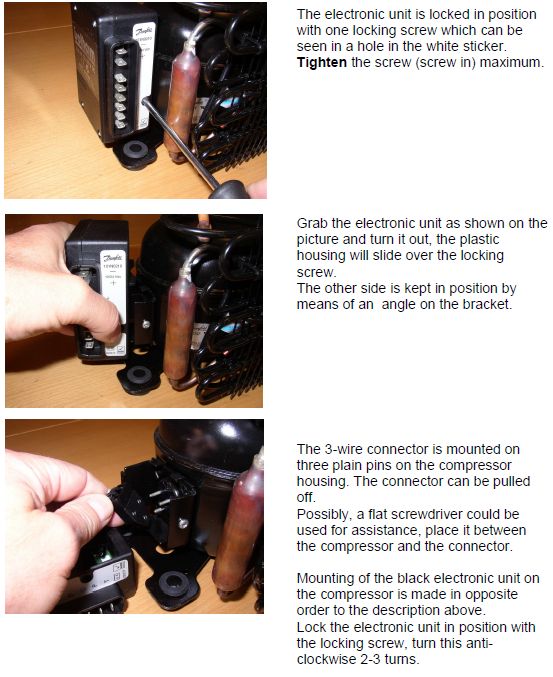
Replacement of the black DC Electronic Control Unit on BD35F and BD50F
Danfoss Compressor - Advanced Troubleshooting
- Danfoss has a built in Error Code System that can be helpful in diagnosing a specific problem. To display the error code and LED (light emitting diode) must be connected between the + and D terminals on the electronic control module. The exact error is determined by counting the number of times the LED blinks. See below for code info.

The Danfoss Compressor electronics have additional system protection features built in. Knowing how these features operate can help diagnose problems. Protection is provided for the following:
- Low Voltage: To prevent batteries from being totally discharged, the compressor will be stopped if the voltage at the terminals on the module falls below 10.6 volts (23.4 volts), and will not restart until the voltage rises above 11.7 volts (24.0 volts).
- High Voltage: If the voltage exceeds 17 volts, the module stops the compressor and switches into 24 volt mode, but will not attempt to start the compressor until the voltage reaches 24 volts.
- Compressor Non-Start: If the compressor does not start, the module will stop the start process and re-attempt a re-start every 60 seconds.
- Compressor Speed Too Low: If the compressor speed falls below 1900 RPM the module will stop the compressor.
- Fan (Pump) Protection: If the current draw across the fan terminals exceeds 0.7 amps 12VDC, the compressor will be stopped and a re-start attempted every 60 seconds.
- Module Overheat: If the heat sink on the module exceeds a pre-set temperature, the compressor will be stopped and will be re-started when normal operating temperatures are resumed.


